RemoteApp on Windows Server 2012
In this Tutorial I will show you how you can set up RemoteApp publishing using a single server.
Following these simple steps..
Step 1
From the new Server Manager, click the Manage menu and select Add Roles and Features.

One of many new features that the new Server Manager offers is the introduction of scenario-based installation.
Step 2
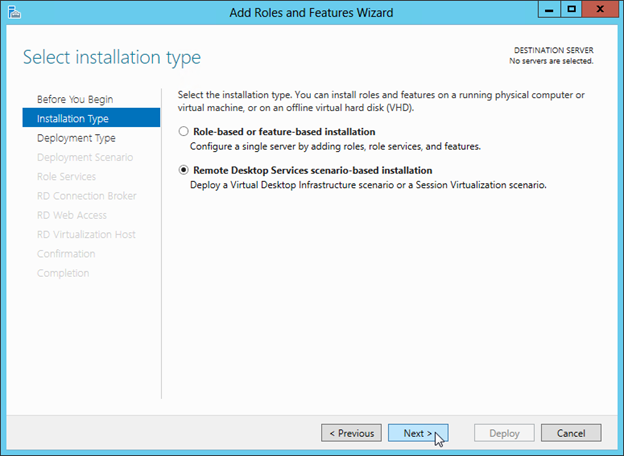
Now check to Remote Desktop Services Scenario-based Installation..
Step 3
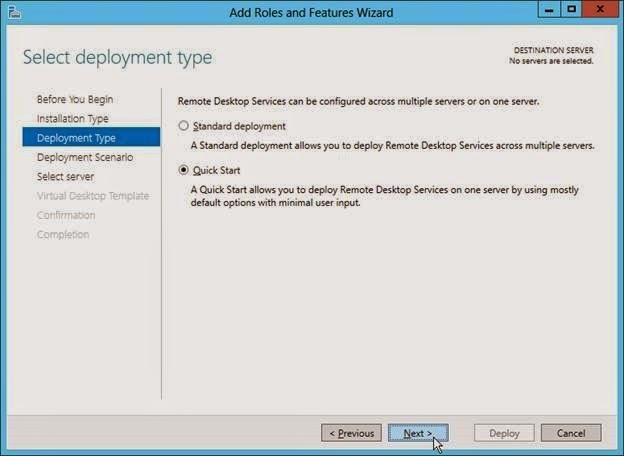
Now check to Quick Start to deploy everything on one server..
Then Click Next
Then Click Next
Step 4
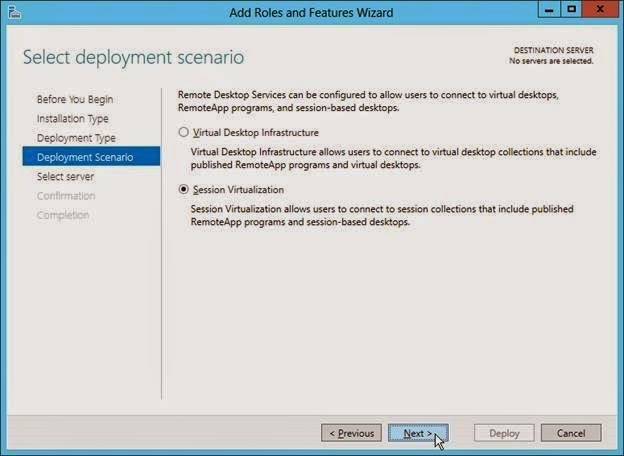
Now check to deploy the Session Virtualization on one server..
Then Click Next
Then Click Next
Step 5
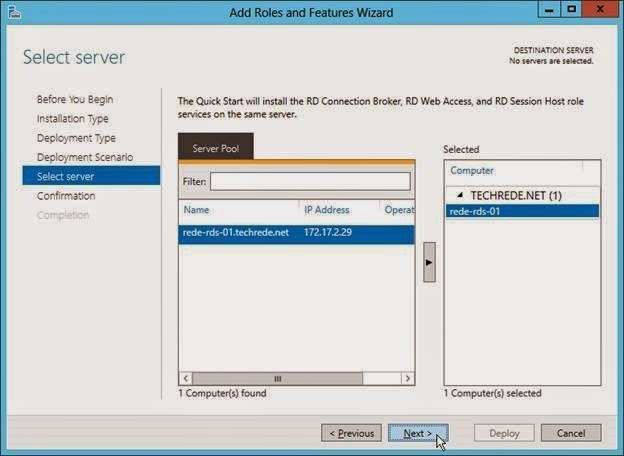
The local server you’re connected to should be added to the Selected list by default.
Make sure that’s the server you are going to deploy all of the RDS roles onto and click Next.
Step 6
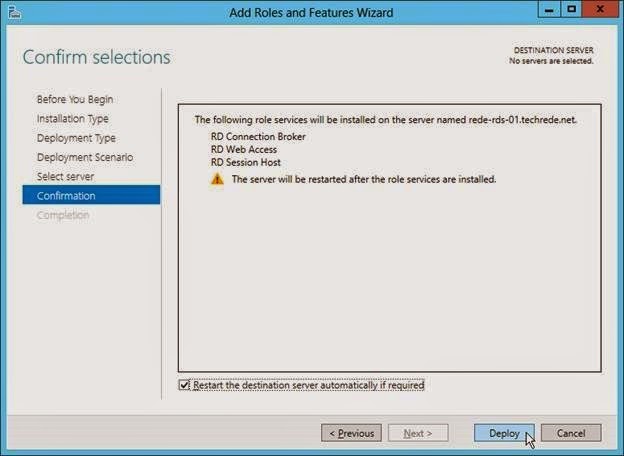
On the Confirmation page you will have to check the “Restart” option as the installation of the Session Host role requires a reboot. Then click Deploy.
Step 7
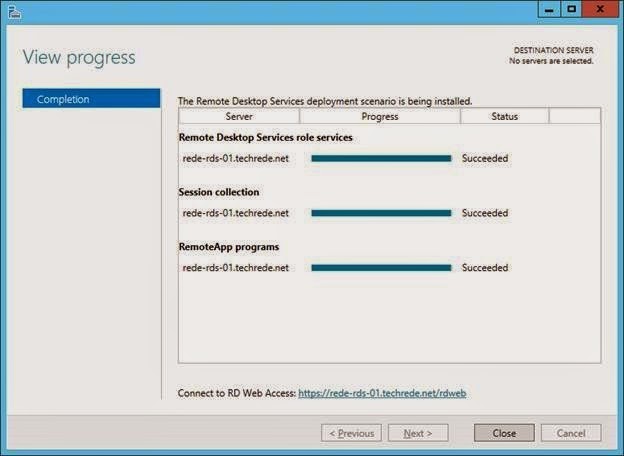
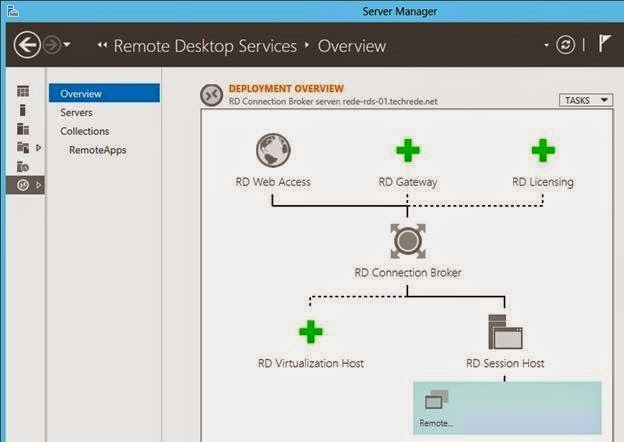
After the reboot, log back into the server and the Server Manager should resume to show you the status would be Succeeded!
Step 8
Click the link at the bottom of the page to view the list of available RemoteApps.

Step 9
When connecting to the RDWeb page you will get a certificate warning because the quick deployment uses a self-signed certificate which can be replaced later.
So click Continue.
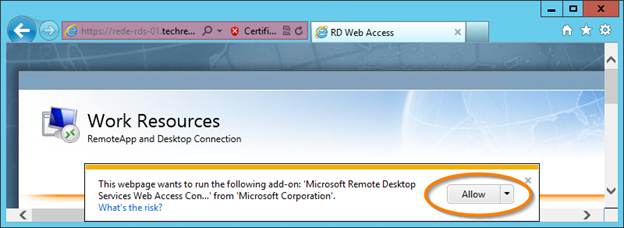
You can click Allow here, but a Group Policy can be made to allow this automatically.
Step 10
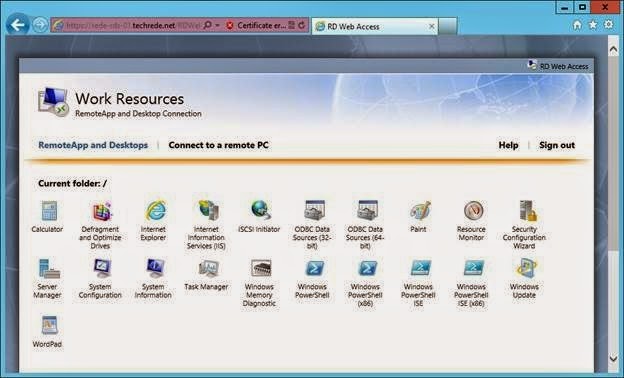
Once connected, you will see a list of applications that are published already.
This is a result of using the Quick Start deployment, and we were not going to want to publish all of these Apps, so let’s take care of that right away.
Step 11
This is a result of using the Quick Start deployment, and we’re not going to want to publish all of these Apps, so let’s take care of that right away.

Step 12
Return to the Server Manager and click on the new “Remote Desktop Services” page on the left, then click on Collections.
“Collections” is a new term that describes a set of services that the RDS deployment offers such as a collection of RemoteApps, Desktop Sessions or Virtual Desktops.

Step 13
Enter a Collection Name, something like RemoteApps works well.
Then Click Next.
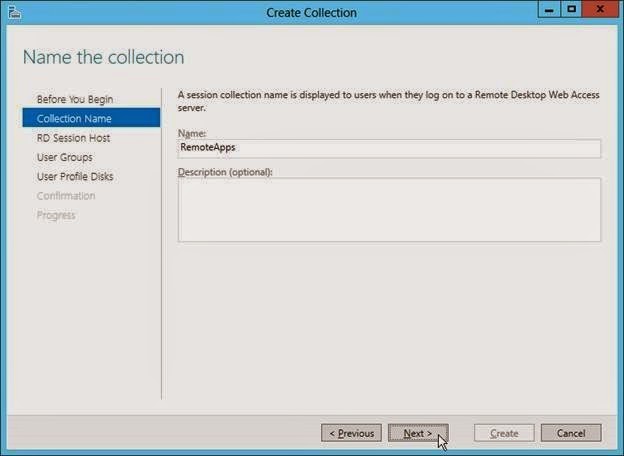
Step 14
Now select your Session Host server and click the arrow to add it to the Selected list.
Then Click Next.
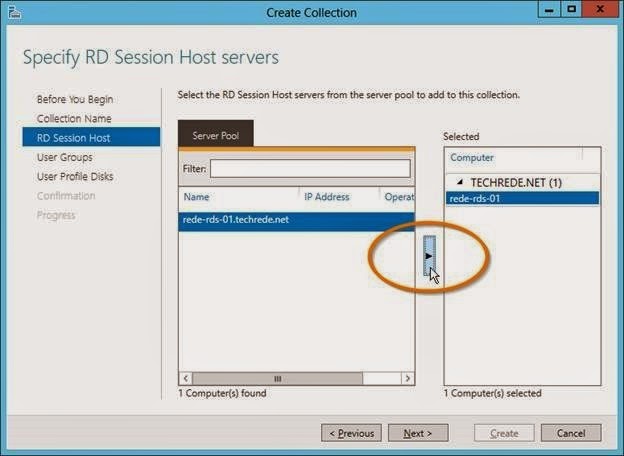
Step 15
The default group of users that are allowed to access the applications in this collection will be Domain Users.
Now Click Next.
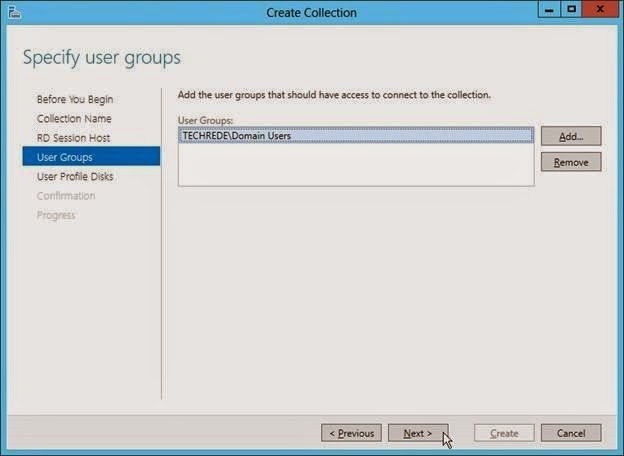
Step 16
To keep things moving quickly, let’s skip the User Profile Disks for now.
Check to Enable user profile disks.
Then Click Next..
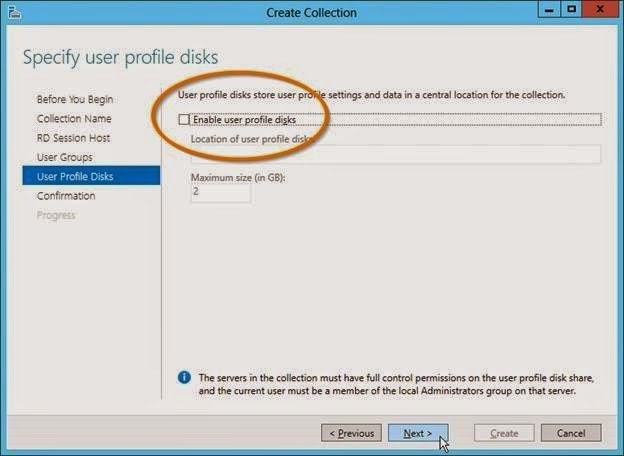
Step 17
Click Next then Create to finish the Collection wizard. When it’s done, you can click Close.
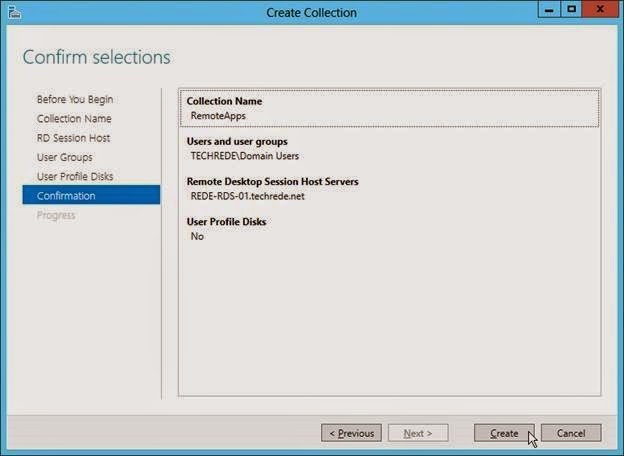
Step 18
When progress will be completed simply click to close..
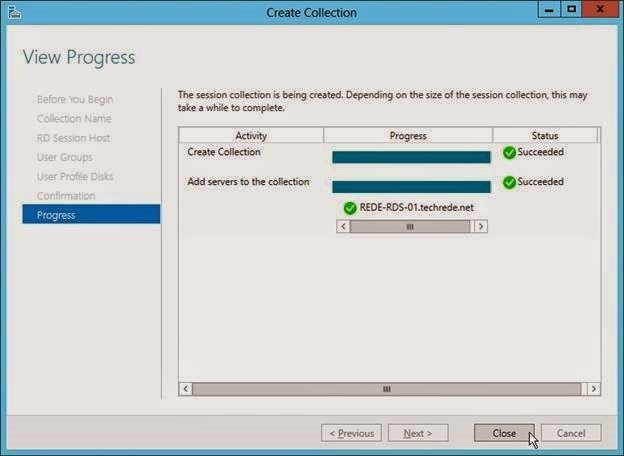
Step 19
Now it’s time to publish the applications you really want to give users access to From the Remote Desktop Services page, select the new RemoteApps collection you made and then from the Tasks button by RemoteApp Programs, select Publish RemoteApp Programs.
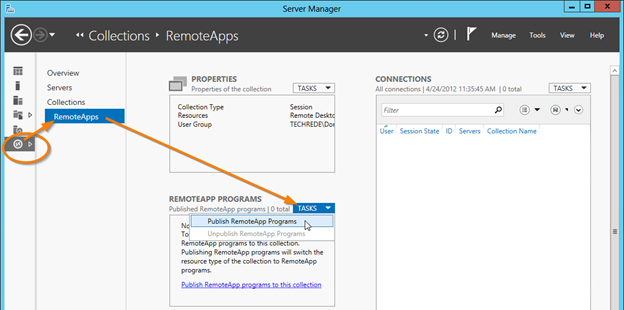
Step 20
You can select a program from the list or click “Add Another Program” to browse to an executable.
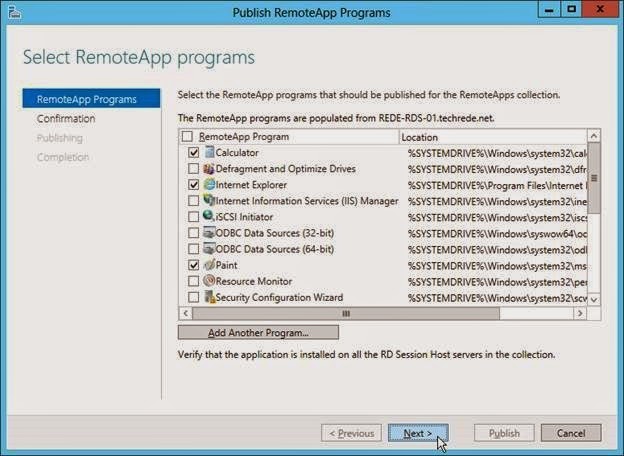
Step 21
When you were satisfied with your selection click Publish.
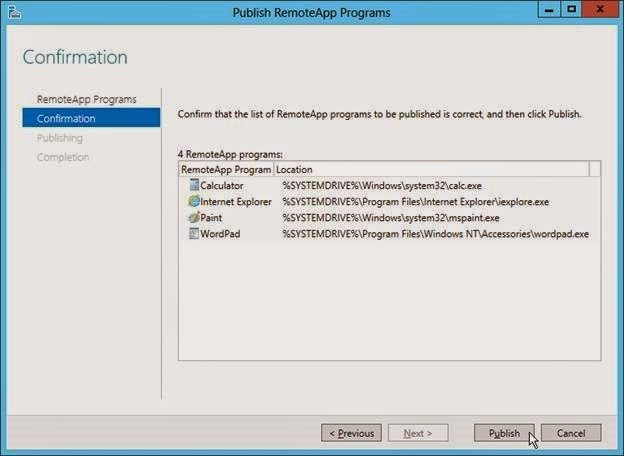
Step 22
Now click Close.
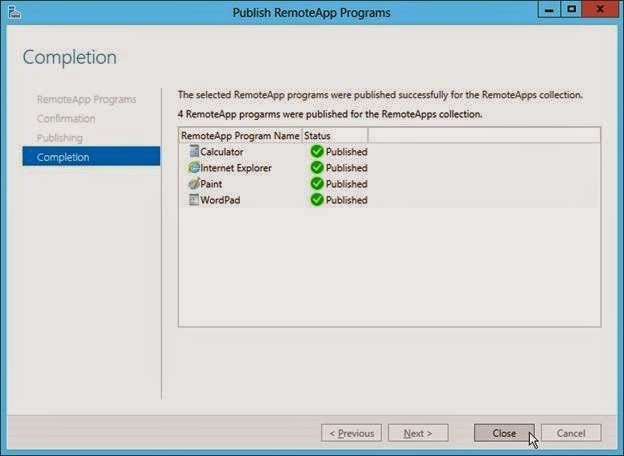
Step 23
Now refresh the RDWeb page and you will see only the applications that you selected.
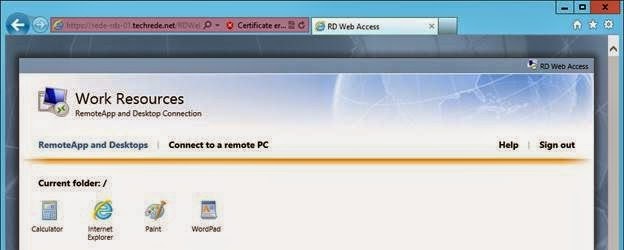
Step 24
Click on one of them to connect to the RemoteApp.

Step 25
Once connected, the application would look just like any locally installed application, but you will notice a new system tray icon that show you are connected to a Remote Work Place.
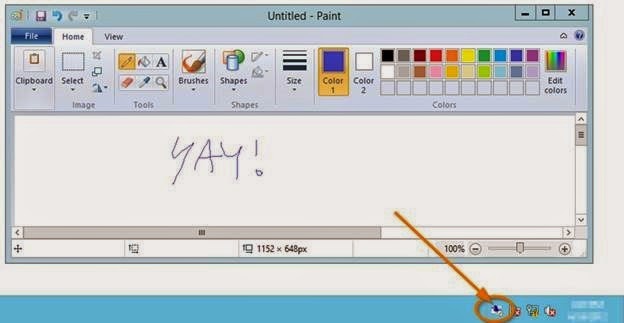
Step 26
RDS, Quick and Easy on one server in less than an hour.
Now you can install new applications and publish them to your Collection.
Similar to Windows 2008 R2,
you can deliver these RemoteApps from RDWeb or by subscribing to the RemoteApp RSS feed.
Thank You
By Anas Amin
By Anas Amin
Show Konversi KodeHide Konversi Kode Show EmoticonHide Emoticon